Case-by-Case Analysis
This tutorial introduces the feature programming language and shows how control structures can be used to perform case-by-case analysis.
As an example, a simple quiz is written. The player of the quiz (i.e. yourself) will try to match a number that gets generated by the feature.
New Feature Definition
Remember: The feature definition is the “template” (in the Features tab) and represents the basis for the resulting features (in the CAD tab). It contains the (programmatic) description of the feature’s behavior.
- Create a new definition by selecting Model workspace > Features tab > Create Definition
- Enter “SimpleQuiz” in the Type Name field ( General tab).
- Enter “Match the Number” in the Label field.
- Expand the options under Show Options.
- Disable the Enable Transient checkbox.
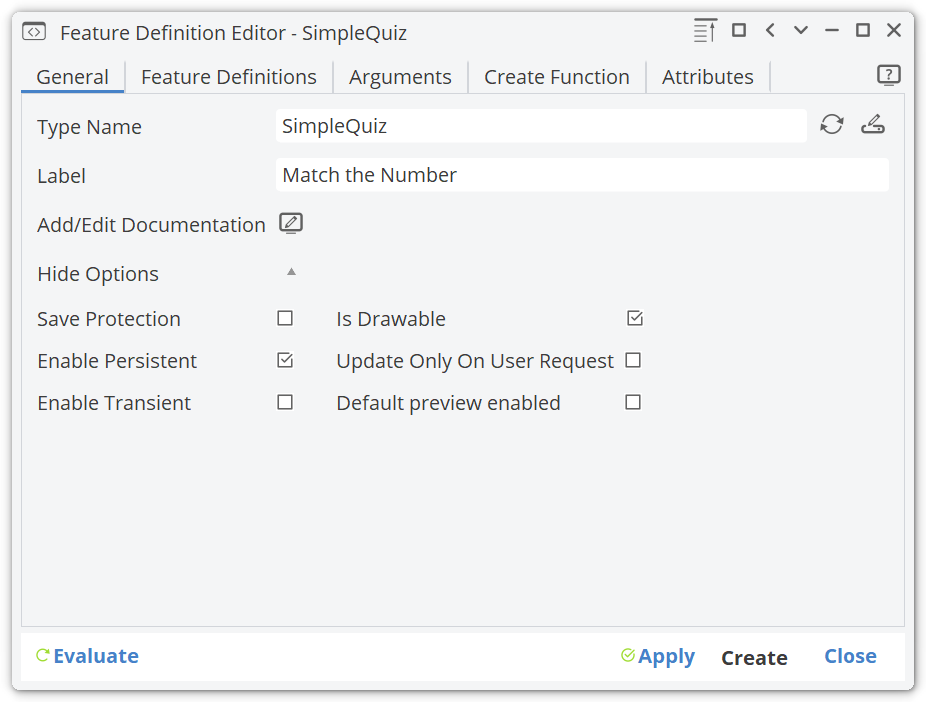
This is a basic setup of the feature definition. It is called “SimpleQuiz” and will be labeled “Match the Number” in menus. It is a type definition since only persistent creation is enabled.
Transient execution (Enable Transient in the screenshot) is equivalent to macro systems: it is a series of commands that get executed. No feature object is then available in the tree.
Arguments
First of all, our quiz needs a question. The input to the question is the argument that is then passed to the programmed logic.
- Select the Arguments tab.
- Select
FIntegerfrom the pull-down list in the column Type. - Enter “try” as name for the input.
- For the default value, enter
10. - Deselect allow expression.
- Select the Required checkbox.
- Enter “Try a number between 0 and 100” into the column Label.

Now we created the user interface for our little quiz. It’s time to take a first look at it.
- Press the Apply button in the lower right corner of the dialog.
- Press the Create button (next to the Apply button)
- In the Pop-up Window press Create again to create a feature instance in the CAD tree.
- Go to the CAD tab to se the newly created feature and click on it.
- Rename SimpleQuiz1 to "quiz".
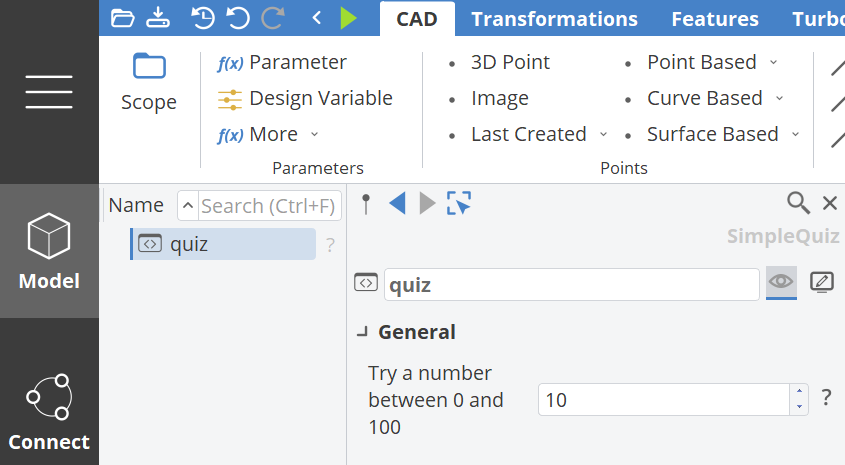
You can enter any integer number into the single input field of quiz. However, so far nothing happens when you do so. Now we need to implement the game logic.
Create Function
The question for our quiz is complete, however, we need to evaluate the “try” and give a result to the person taking the quiz. This is done in the command sequence defined in the Create Function tab of the Feature Definition Editor.
- Go back to the Feature Definition Editor.
- Select the Create Function tab.
- Paste the following text into the text editor – it will be explained line by line.
integer value((rand() * 100).toUInt())
integer difference(abs(value - try))

if (difference == 0)
  echo("congratulations, you are spot on!")
else
  echo("No, that was not the number.")
  echo("The number I was thinking of was " + value)
endif
- Press Apply.
- Go back to the CAD object tree and select the feature “quiz” again. If it is already selected, deselect it and select it again (this refreshes the feature interface in the object editor).
- Enter a number between
0and100in the text field and watch the console window.
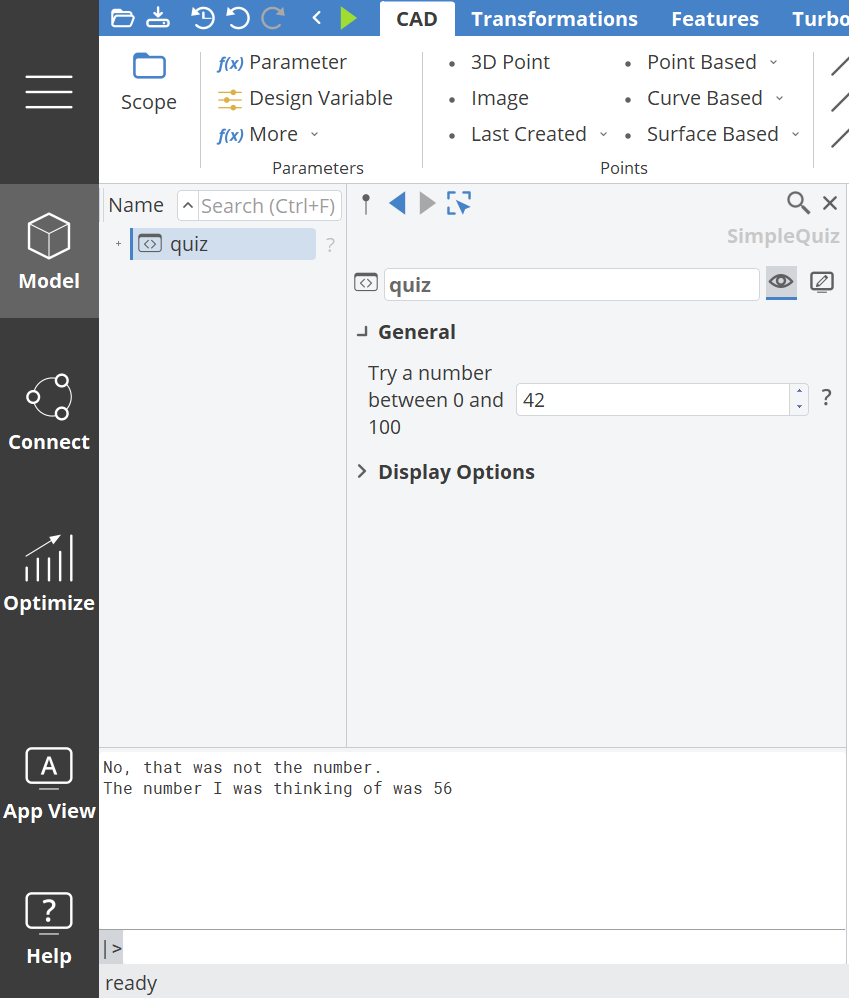
Depending on the quality of your try, the console output will either read “Congratulations, you are spot on!” or (more likely) “No that was not the number” and in a new line “The number I was thinking of was “ followed by a number between 1 and 100. Now let us take a look at the code line by line.
Types and Conversion
Let’s have a look at the first line. The number to match needs to be generated. This is done with this line:
integer value((rand() * 100).toUInt())
In order to understand that line, we need to analyze it starting from inside the most inner parentheses. The command rand() returns a randomly generated value between 0 and 1. Since we are looking for a number between 1 and 100, it is then multiplied by 100. As the number to match is supposed to be an integral value, and the result of the multiplication is still a floating point number, it is converted to an unsigned integer value using the toUInt() command. The result of that command is then stored in a variable called value which is defined to be of type integer.
Converting a floating point number to an integral value using the toInt() or toUInt() command
cuts of the decimal places but performs no rounding. If you want to add rounding, you should add
0.5 to the floating point value before using the toInt() command. Alternatively, use the global
commands floor() and round(). See the type documentation for more information.
The integral type integer can also be abbreviated to int. Another integral type is unsigned (or uint)
which represents positive integers only.
As a shortcut to pressing the Apply button you can also use the keyboard shortcut Ctrl + S.
CAESES Project File
If you want to take a look at the finalized model you can find the resulting CAESES project file case-by-case-analysis-quiz.cdb here: