Functions
In this tutorial a feature is defined that creates the Sierpinski triangle. For such a mathematical structure we have to repeatedly create triangles. The subtask of creating a single triangle is defined in a function that is directly embedded in the feature definition. We can then simply call this function multiple times in a recursive sequence.
Functions can ease your work with feature definitions. In particular, they make your command sequence more readable and easier to maintain.
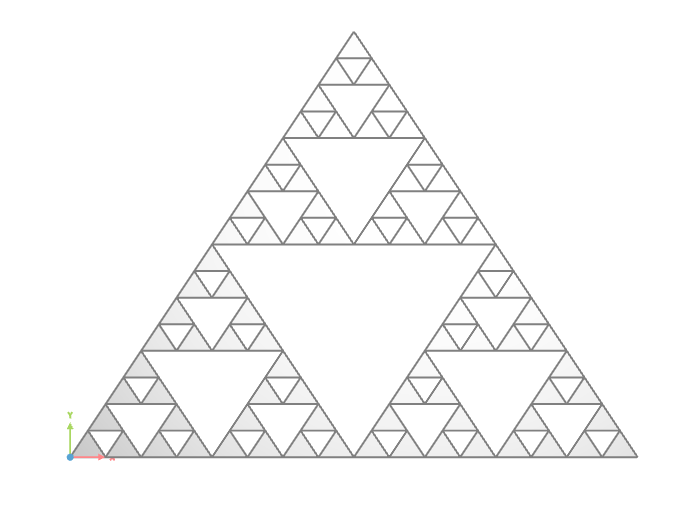
New Feature Definition
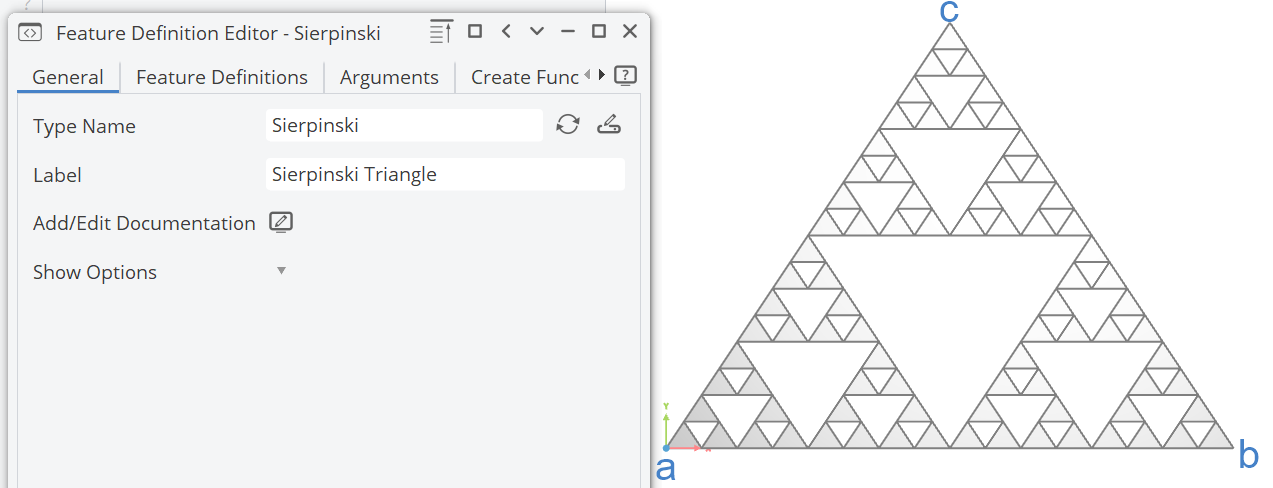
We start from scratch by creating a new feature definition. This definition will later create the entire Sierpinski triangle.
- Create a new definition by selecting Model workspace > Features tab > Create Definition
- Enter "Sierpinski" in the Type Name field ( General tab).
- Enter “Sierpinski Triangle” in the Label field.
The Sierpinski triangle needs a starting triangle (three vector positions) and a depth that defines how often the recursive triangle creation will be executed.
Choose three FVector3 arguments for the positions; call them a, b and c and set some default values (see screenshot). Choose an FUnsigned argument for the depth and set a default value of 3.
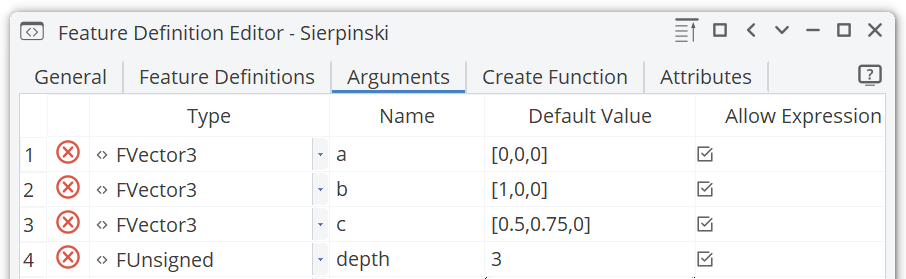
We chose the type FUnsigned for “depth” since we expect only positive integer values (“unsigned integer”). If you would like to allow negative input values for your definitions, then choose the type FInteger.
Function for Triangle Creation
Creating a triangle is a rather simple task that can be encapsulated in a function. This is done in this step. The function takes three vector arguments p1, p2 and p3 (type FVector3) and creates a triangle by using a ruled surface between two lines. An entity group called “triangles” is also defined. It is our container that will store all upcoming triangles.
- Click on the tab Create Function and type in the following sequence:
 // ***********************************************************
 // Create the Sierpinski triangle through recursive functions
 // ***********************************************************

 // container for storing and visualizing the triangles

entitygroup triangles()

 // function for triangle creation

function createTriangle(FVector3 p1, FVector3 p2, FVector3 p3)
  line L1(p1,p2)
  line L2(p1,p3)
  ruledSurface surf(L1,L2)
  triangles.add(surf)
endfunction
- Press Evaluate to check that are no typing mistakes.
You can copy & paste the sequence from above.
Remember: If you type in commands manually, use auto-completion while typing. For instance, type rule + Ctrl + Space, which
provides the command for the ruled surface (next to other commands that start with “rule”).
Recursive Functions
Next we will define the recursive function that calls the function from the previous step.
- Extend the definition by typing in the following sequence after the function
createTriangle()(after line 16) from the previous step:
 // recursive function

function splitTriangle(FVector3 p1, FVector3 p2, FVector3 p3, unsigned currentDepth)
  if (currentDepth > depth)
    createTriangle(p1,p2,p3)
    return()
  endif

  FVector3 mid1((p1+p2)/2)
  FVector3 mid2((p2+p3)/2)
  FVector3 mid3((p1+p3)/2)

  unsigned d(currentDepth)
  d += 1

  splitTriangle(p1,mid1,mid3,d)
  splitTriangle(mid1,p2,mid2,d)
  splitTriangle(mid2,p3,mid3,d)
endfunction
The function splitTriangle() calls itself three times again as long as the depth constraint (currentDepth > depth) is not violated.
The command return() terminates the feature execution at this point.
Initiate Creation of Sierpinski Triangle
So far, there are only two functions and we still have to initiate the creation of the Sierpinski triangle. Thus, we have to call the function splitTriangle() with the input arguments a, b and c that are provided by the user.
- Type in the following after the function
splitTriangle()and press Apply
 // call the recursive function by using the input data
splitTriangle(a, b, c, 0)
Your Feature code in the Create Function tab should look like this now:
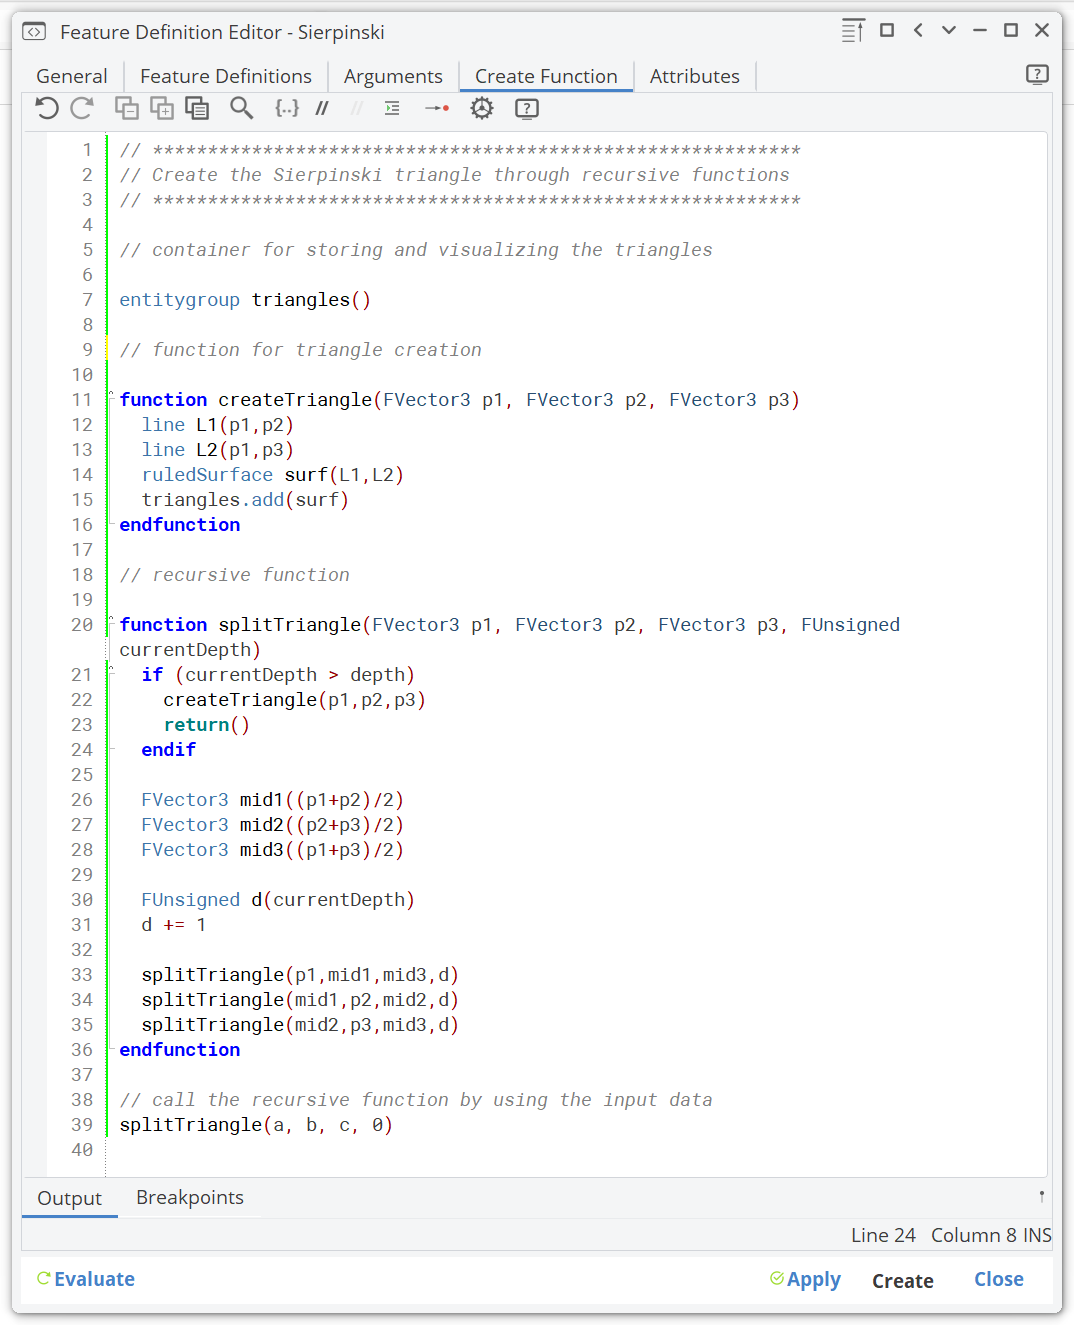
Create a Feature
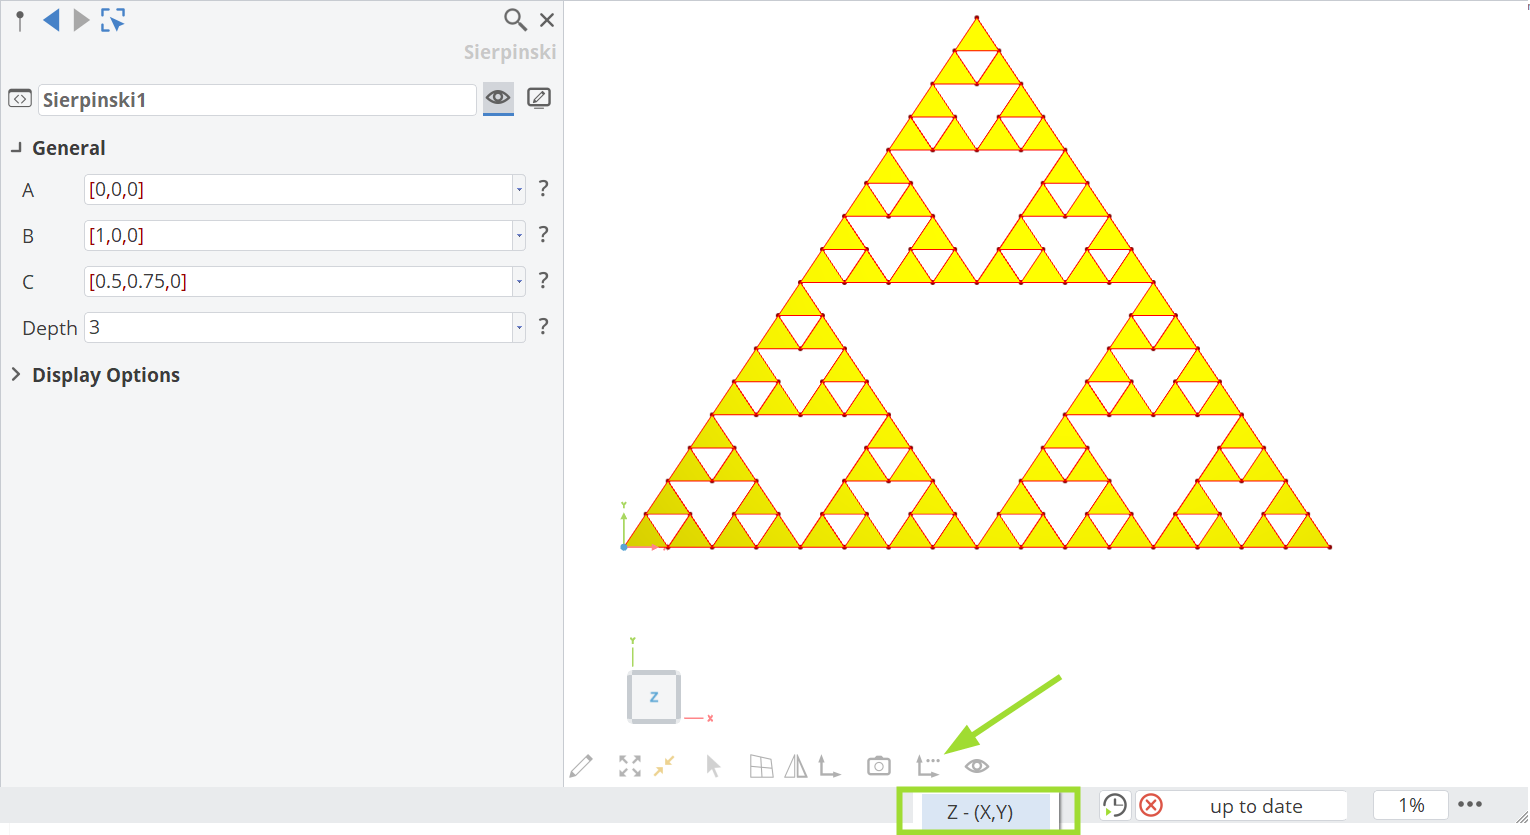
Finally, we can now create a feature from this definition in order to test our Sierpinski triangle.
- Click on Create in the Feature Definition Editor to create a Feature instance in the CAD tab.
- Rotate the 3D view to display the Z - (X-Y) plane to see the triangles.
- Change the input values of the created feature "Sierpinski1" in order to check whether it works correctly.
CAESES Project File
If you want to take a look at the finalized model you can find the resulting CAESES project file functions-sierpinski-triangle.cdb here: