ANSYS Workbench Connection
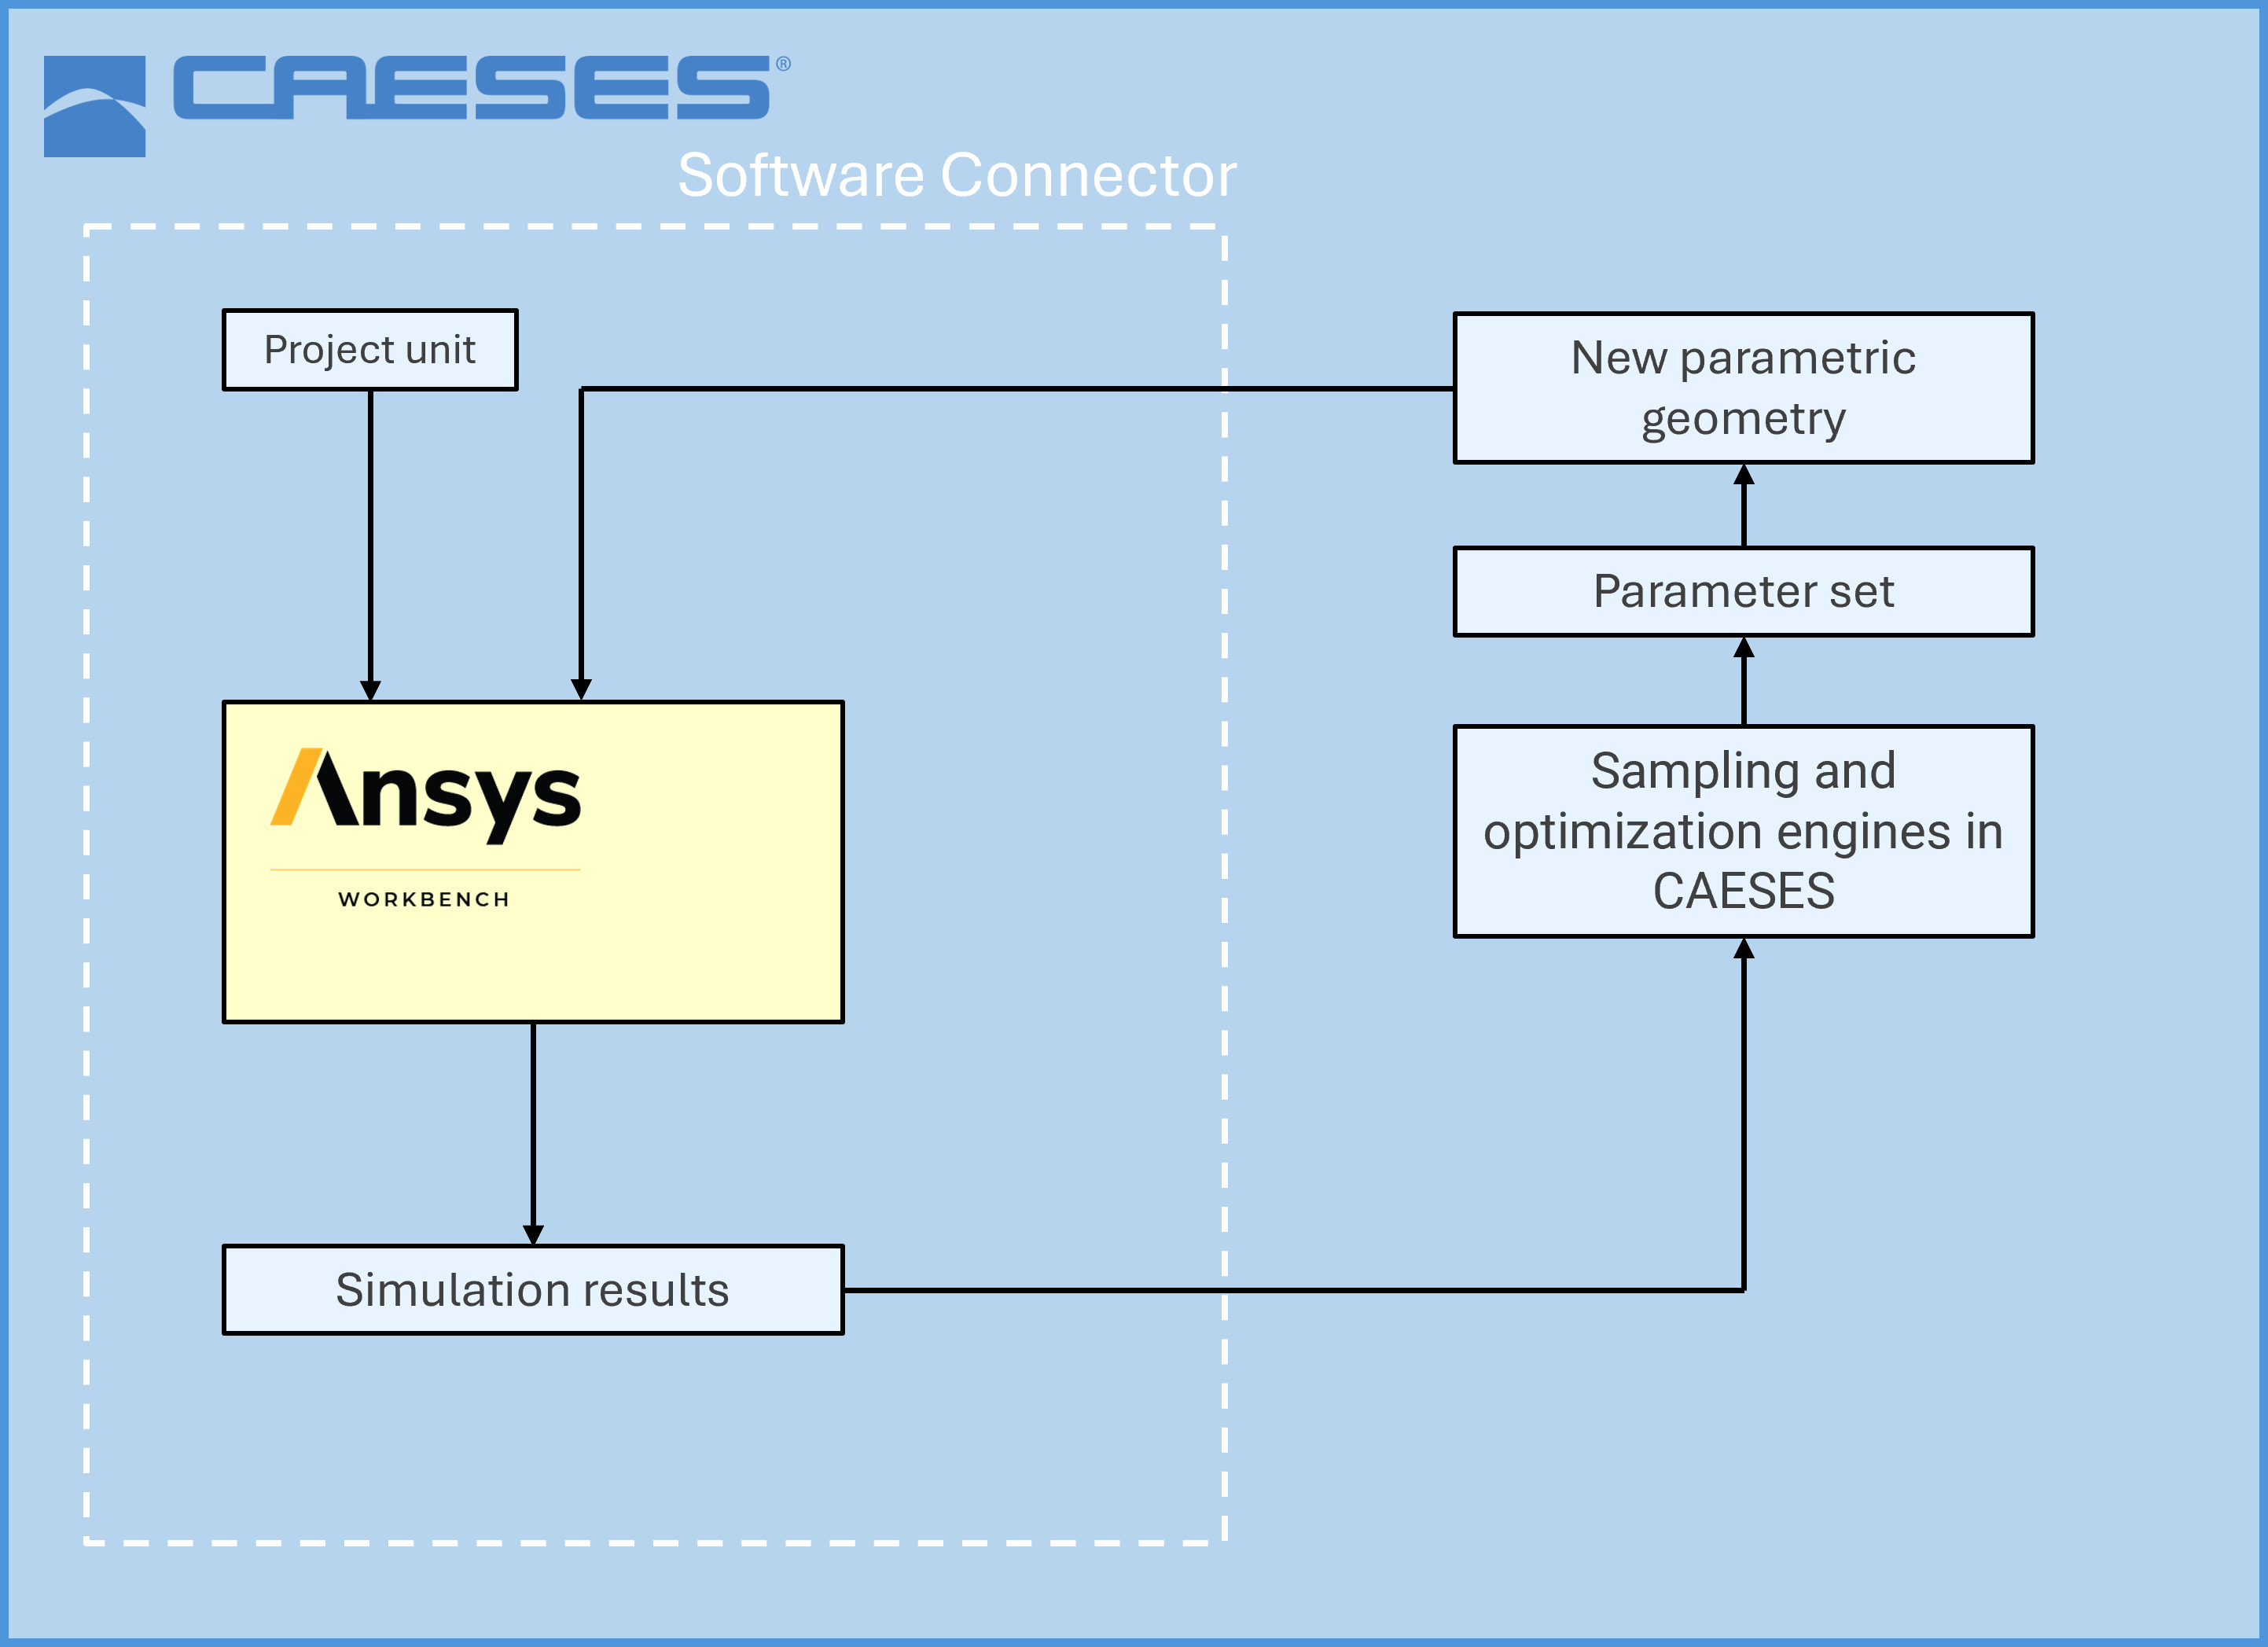
This tutorial describes how an ANSYS Workbench project can be included inside CAESES using the Software Connector to benefit from the CAESES optimization engines. It allows you to create a parametric model, send to ANSYS Workbench in batch mode, obtain the simulation data and use it for optimization purposes. All within the comfort of the CAESES GUI.
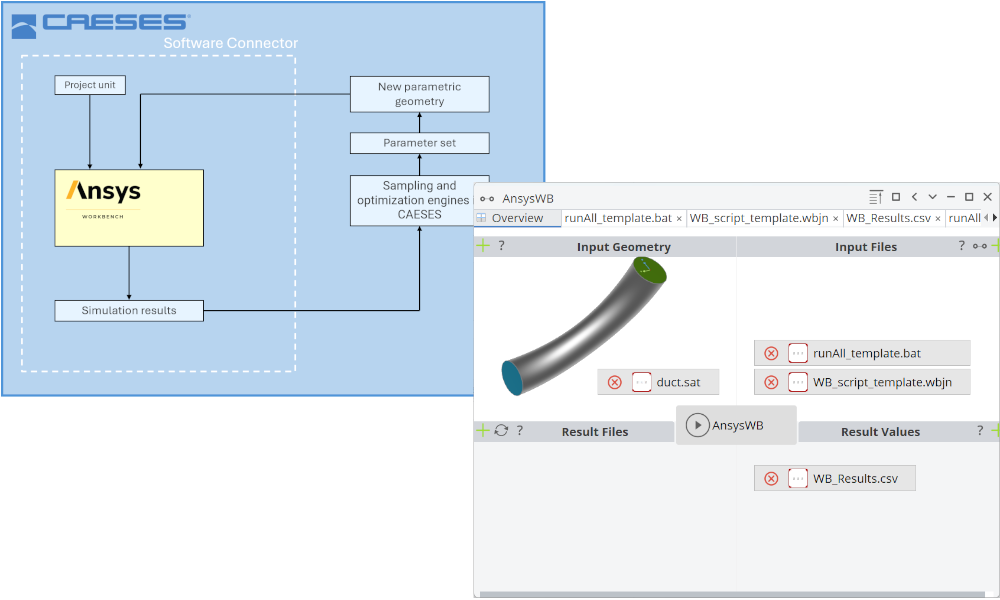
Using the CAESES Geo Engine or CAESES TurboGrid Engine, the full automation of the meshing and simulation process of new geometry variants can be realized using ANSYS Workbench inside CAESES. The required ANSYS Workbench script templates are created automatically which can be used directly in the Software Connector.
CAESES Workbench App
This tutorial assumes, the user has already performed the "CAESES Geo Engine for ANSYS Workbench" tutorial, which addresses how to prepare the CAESES project and the installation of the CAESES Workbench App inside the ANSYS Workbench.
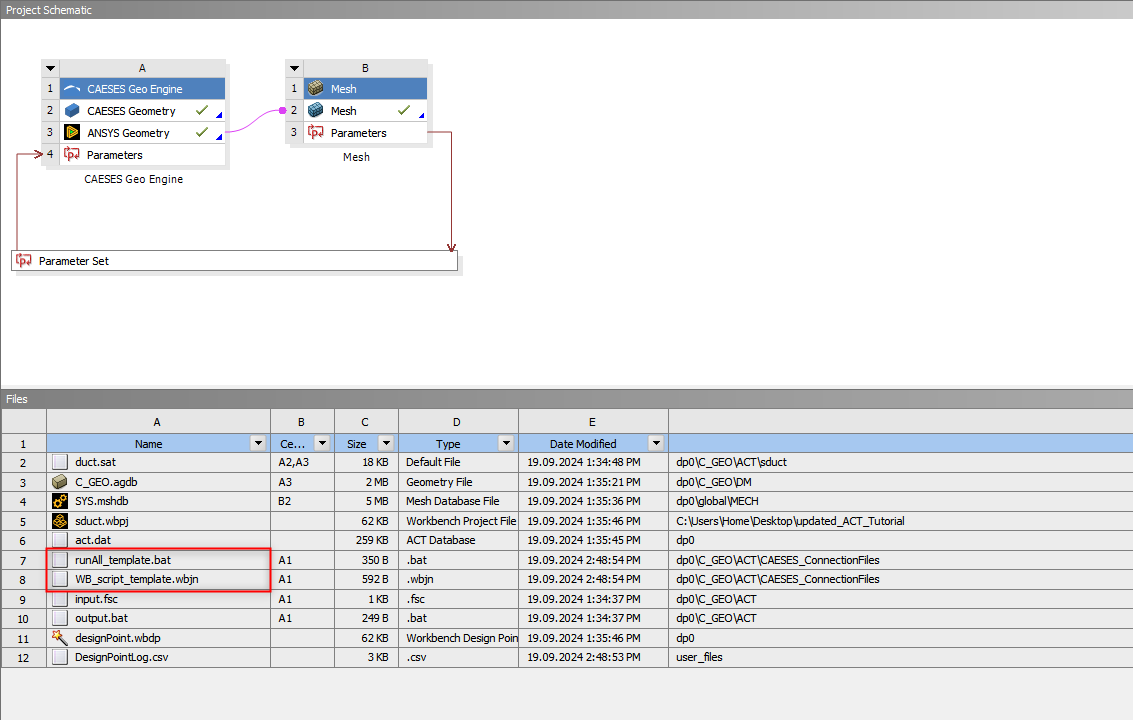
Once the CAESES script file (*.fsc) is consumed by the CAESES Workbench App, several files are created. Among them are the two CAESES Software Connector template files.
runAll_template.batWB_script_template.wbjn
Preparing the Input Geometry section inside CAESES Software Connector
-
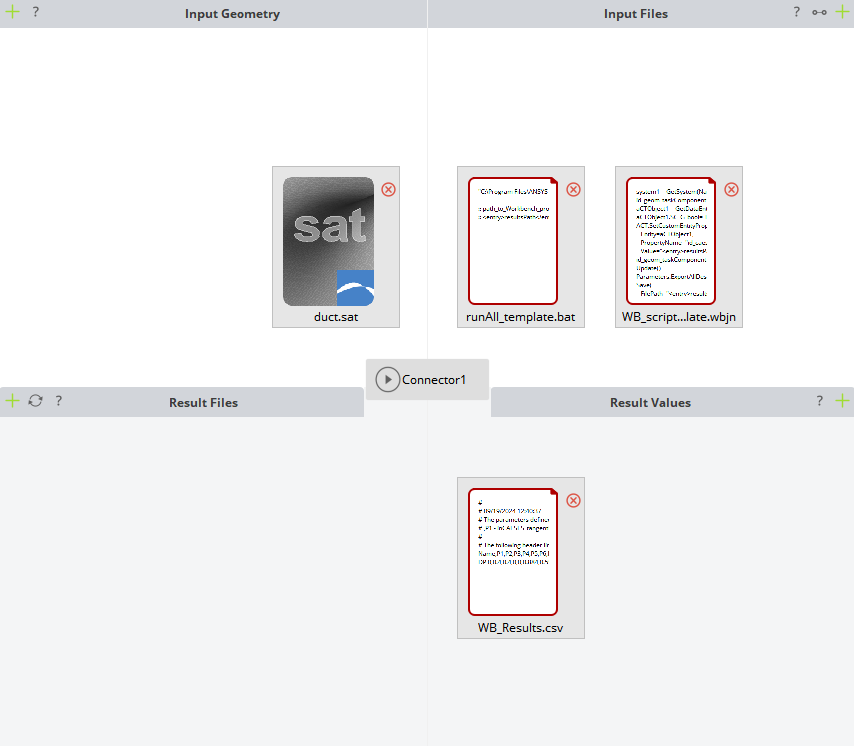
In the Software Connector click the green plus button of the "Input Geometry" section or simply drag and drop the target export geometry inside the "Input Geometry" section.
-
If not provided yet, please add the target export geometry to the list
-
Select
SATas export type. The reason ofSATselection is, to benefit from the support of downstream color information transfer. -
Finally provide an export name, which must be same as the name provided to the export folder.
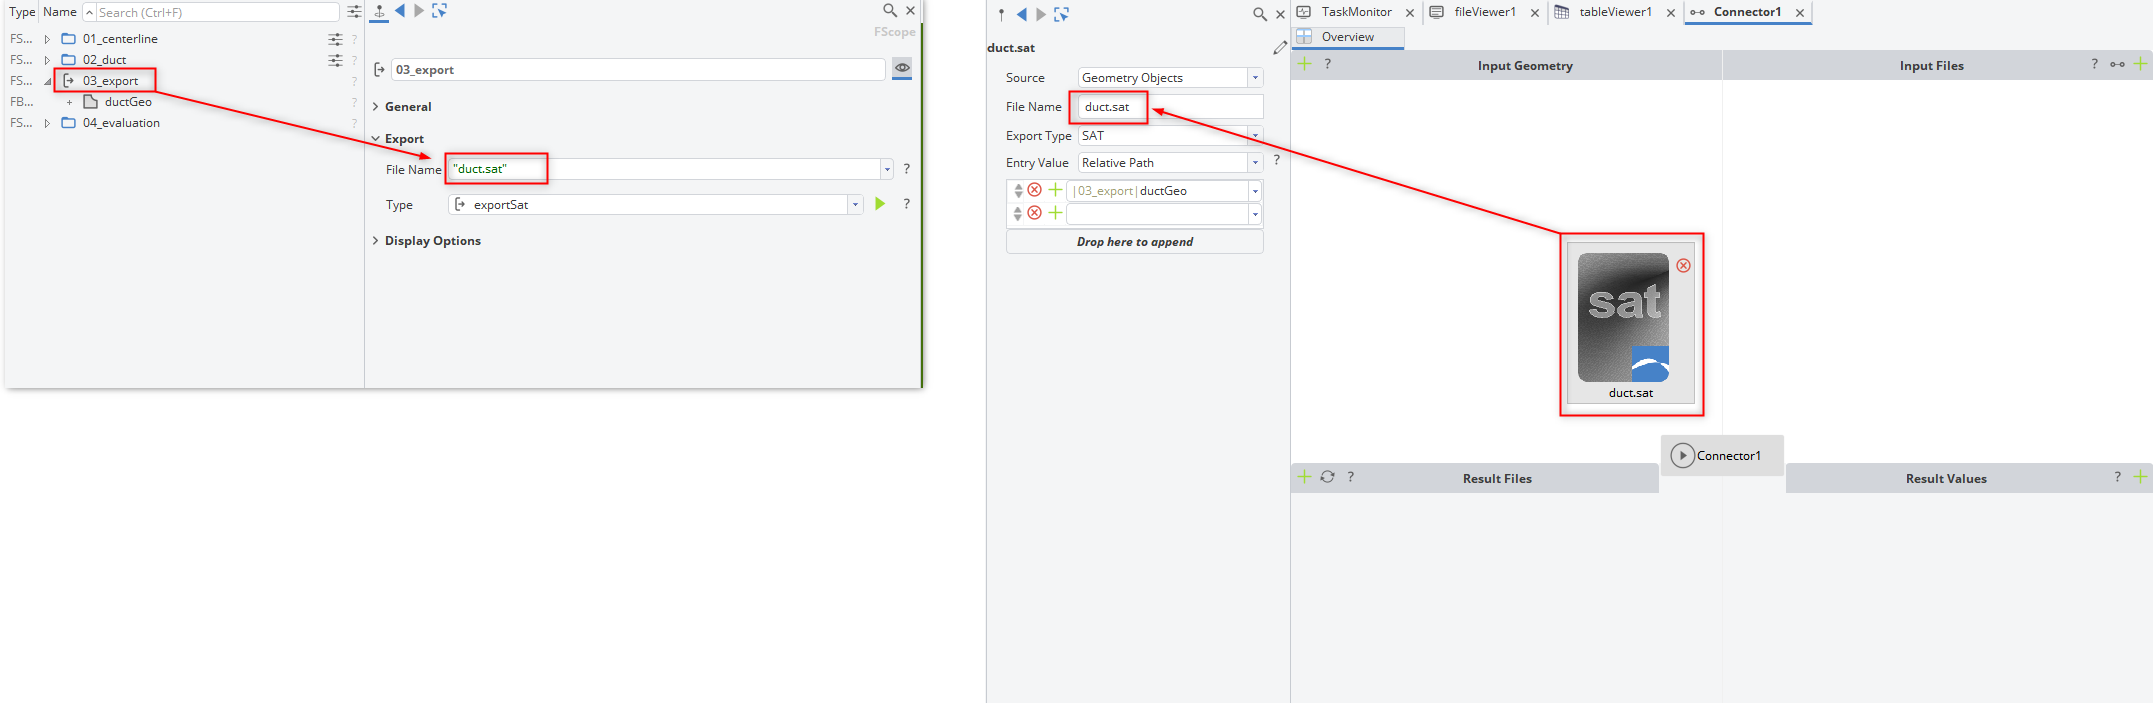
Preparing the Input Files section inside CAESES Software Connector
- Please add the
runAll_template.batfile created by ANSYS Workbench. You can do this by clicking the green plus button and navigating to the file location. In this case the ANSYS Workbench project is calledsduct.wbpjlocated at a certain folder. Within the same folder location, there must be a folder with the name "sduct_files". This is our Workbench project folder. Hence the desired file location must be:
<Workbench project folder> \dp0\C_GEO\ACT\CAESES_ConnectionFiles
Once added, we start parameterizing the file:
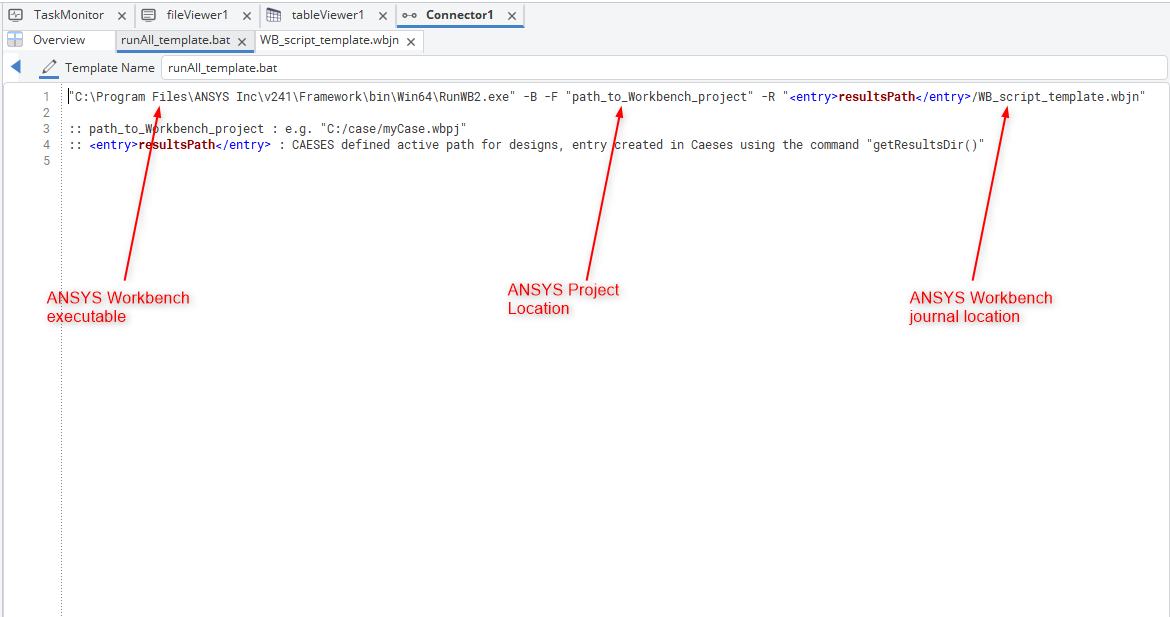
- Update the ANSYS Workbench Executable location, if necessary
- Provide the full path to the ANSYS Workbench Project
- For the ANSYS Workbench journal, please create an entry of
FStringtype with a name "resultsPath". This will create a dynamic link where for each design, a new path is going to be defined.

- Please add the
WB_script_template.wbjnfile as described before.
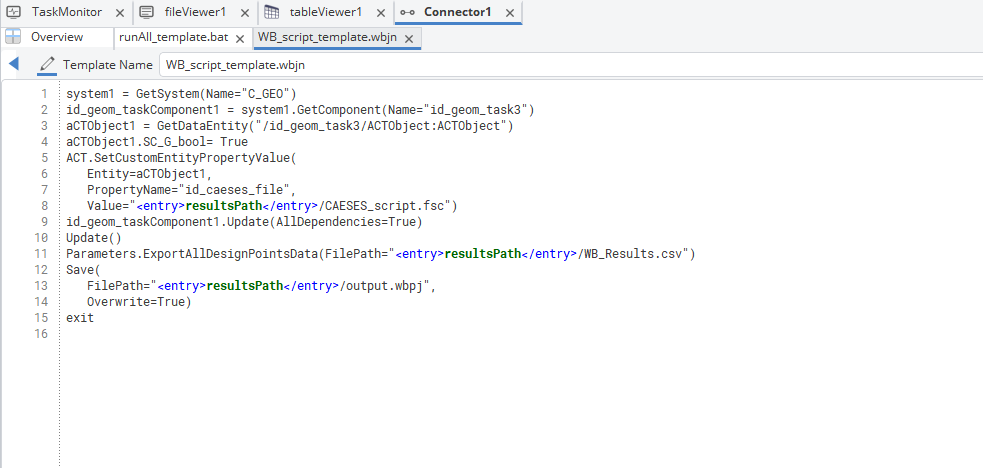
This file is required to dictate ANSYS Workbench the steps required to follow. Among them are updating the whole project using the design specific CAESES fsc file, creating a file where all input and output parameters are written and saving the design specific ANSYS Project.
If on the previous step, an entry has already been created, with the name of "resultsPath", then there is no need to make any changes.
One point of importance in this file is at line 8. Where the fsc file that would automatically update the CAESES Workbench App is defined. The name used is defined as "CAESES_script.fsc"
- Please click the Overview tab and select Connector1.
- In the opened menu, click the green button next to "Application" and for the "Executable" part simply type
runAll_template.bat.
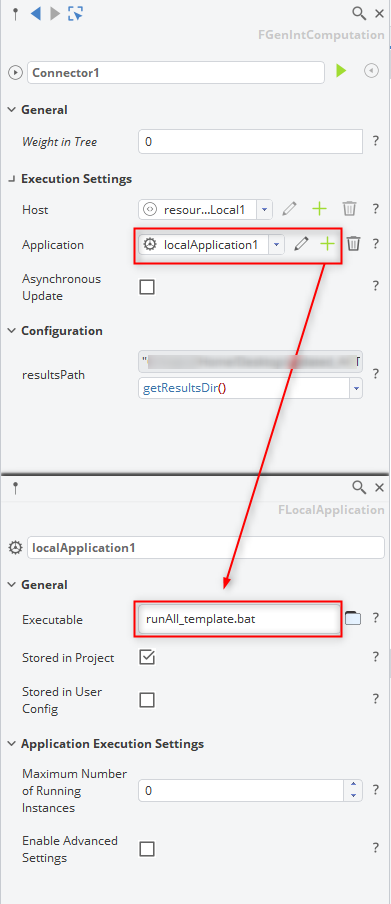
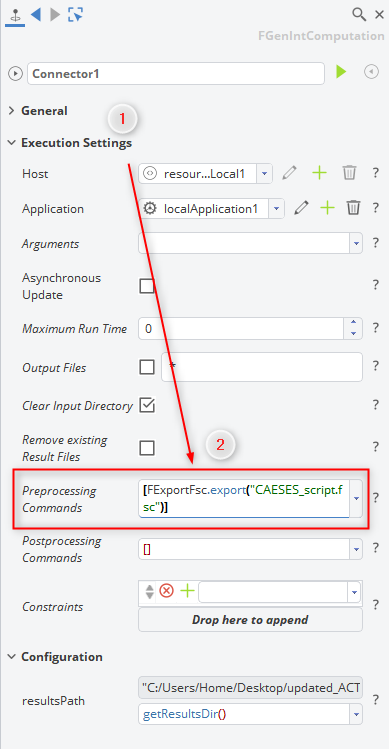
- Now let's return to the Connector1 menu and click the "Execution Settings" label. This will expand the menu and make the hidden inputs visible. Inside the "Preprocessing Commands" entry type
FExportFsc.export("CAESES_script.fsc"). This command will serve to create an fsc file for each design with the updated parameters.
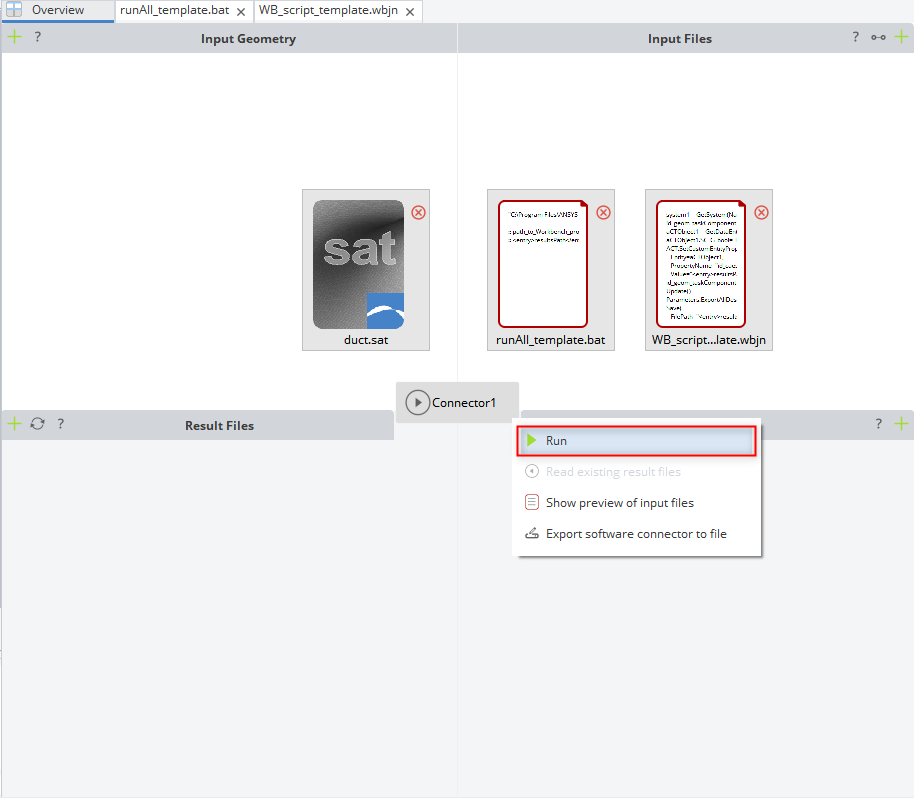
- Now we are ready to perform the initial run.
Preparing the Result Values section inside CAESES Software Connector
- Once the run is concluded, please proceed to the CAESES project folder. Inside the Folder:
<CAESES project folder> \manual_results\baseline\Connector1
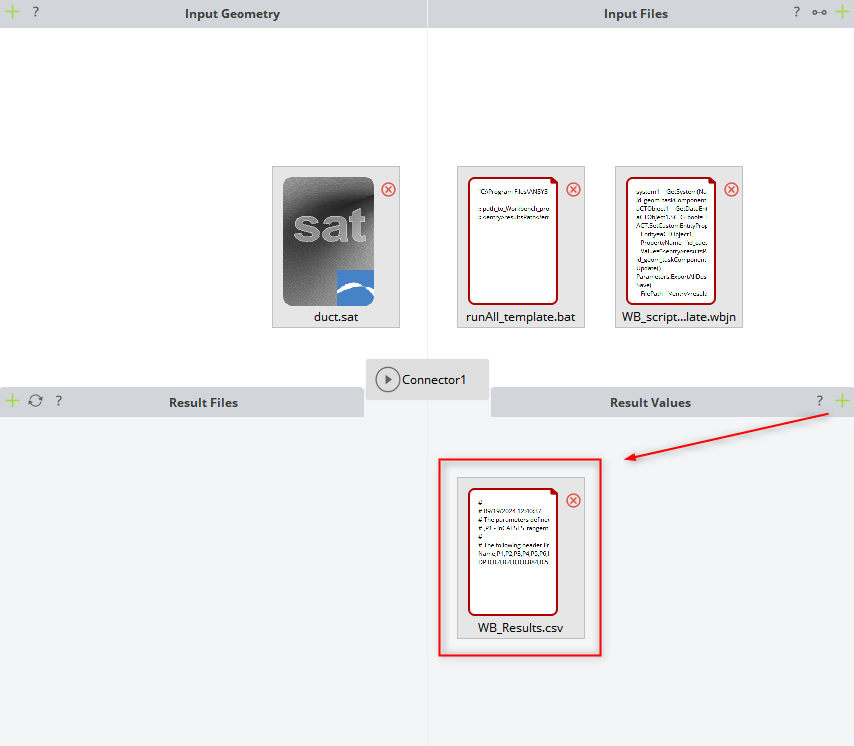
you should find the ANSYS Workbench output file called WB_Results.csv. Please add this file to the "Results Values" by clicking the green plus button and navigating to the file location.
CAESES Project File
If you want to take a look at the finalized parametric model you can find the resulting CAESES project file ansys-workbench-connection-sduct.cdb here: